Teams
Teams let you work on the same designs with other people, and let clients see your work without being able to change it.
Each person you invite gets their own login. You choose which projects they can open and what they can do in them.
Invite someone
- Open the dashboard and pick a project.
- Click Members. You will see People in this project and Pending invitations.
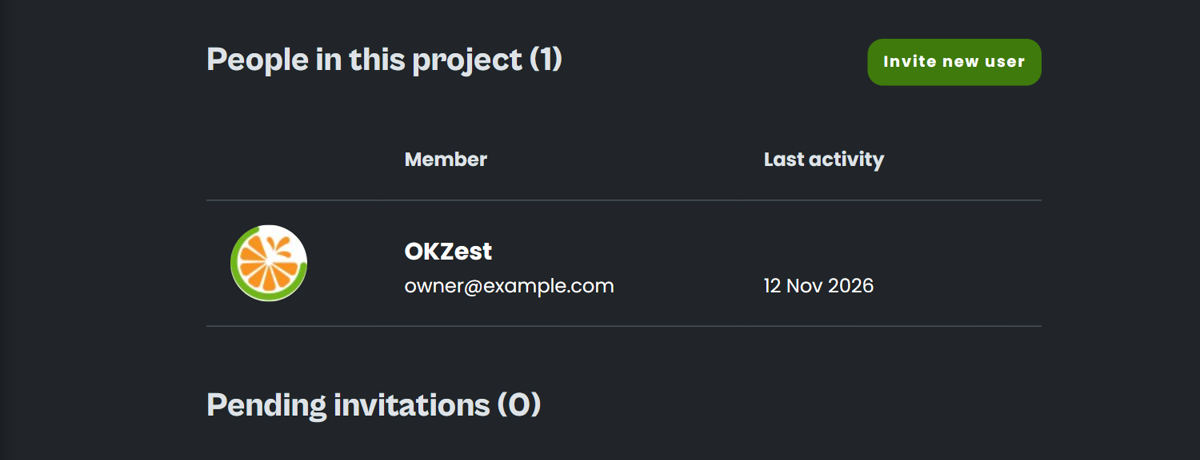
- Click Invite new user.
- Under Who shall we say has sent them an invite?, enter your company name. This is the name shown in the invitation email.
- Enter the email address. To invite several people at once, separate the addresses with commas.
- Tick the projects they should have access to.
- Click a role (Administrator, Designer, Finance or Client) to fill in the permissions, then tick or untick individual permissions to fine-tune them.
- Click Send invite.
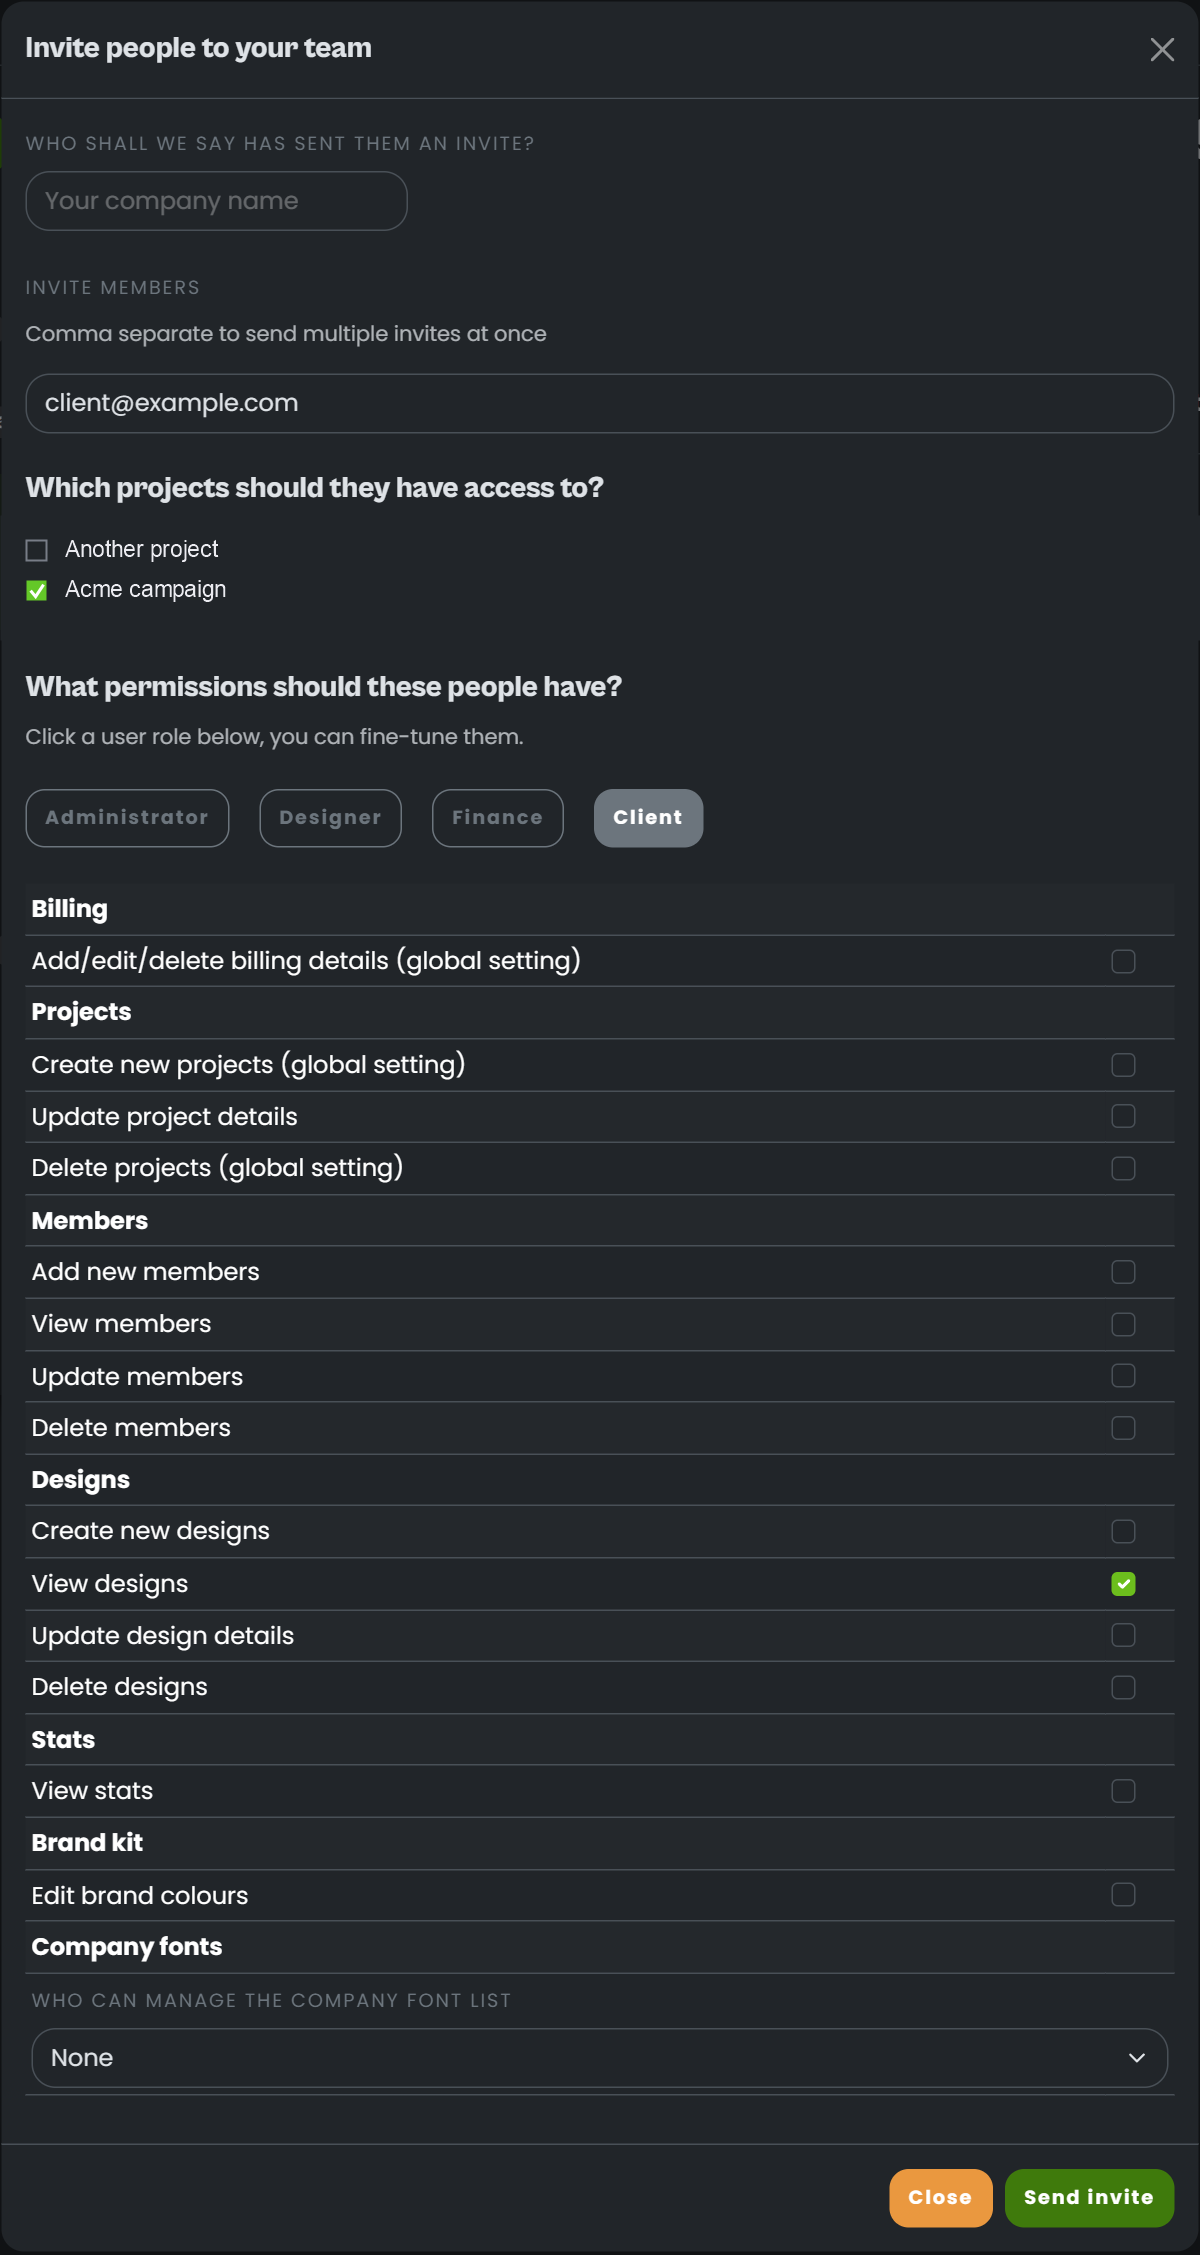
You can invite up to 10 email addresses at once, and up to 20 invitations can be pending at a time.
They get an email. Until they accept, they appear under Pending invitations.
Inviting people is not available on free accounts. If you are on the free plan, Invite new user shows an upgrade prompt instead. See Pricing.
Roles
A role is a shortcut that ticks a set of permissions. After you pick one you can still change any of them.
| Administrator | Designer | Finance | Client | |
|---|---|---|---|---|
| View designs | Yes | Yes | - | Yes |
| Create designs | Yes | Yes | - | - |
| Update design details | Yes | Yes | - | - |
| Delete designs | Yes | Yes | - | - |
| Billing details | Yes | - | Yes | - |
| All other permission checkboxes (members, projects, stats, brand kit) | Yes | - | - | - |
For the full list of permissions, see Permissions.
You can only give someone permissions that you hold yourself.
Permissions
| Group | What you can allow |
|---|---|
| Billing | Add, edit and delete billing details. This applies to the whole account. |
| Projects | Create new projects and delete projects (both apply to the whole account). Update project details (set per project). |
| Members | Add, view, update and delete members. |
| Designs | Create, view, update design details and delete designs. |
| Stats | View stats. |
| Brand kit | Edit brand colours. |
| Company fonts | Who can manage the company font list: all projects, this project, or none. |
Project access
Access is set per project. Someone who is a member of Project A cannot see Project B unless you add them to it too.
To change what a person can do, or remove them, go to Members in the project and use the edit or delete icon beside their name.
When you duplicate a project, its members are copied to the new project, along with their design, project, member, stats and brand kit permissions.
Example: share a project with your client
This is a common agency setup. Your team builds the designs together, and your client watches the progress without being able to change anything.
- Create a project for the client, for example Acme campaign.
- Invite your teammates to that project with the Designer role. They can create, edit and delete designs in it.
- Build the designs together.
- Open Members in the project, click Invite new user and enter the client's email.
- Tick only the Acme campaign project.
- Click Client. Only View designs is ticked.
- Click Send invite.
Your client can now sign in and view the designs in that project as you update them. They cannot create, edit, rename or delete designs, or open other projects.
Keep one project per client. Because access is per project, you can then invite each client to just their own work.
Plan limits
The number of team members depends on your plan. See Pricing for the full comparison.
| Plan | Team members |
|---|---|
| Free | Cannot invite |
| Micro | 1 |
| Starter | 2 |
| Pro | 5 |
| Enterprise | Unlimited |
- Team members are everyone in your company, including you as the owner, plus any pending invitations.
- Re-inviting an address that is already pending does not use another place.
- The limit only stops new invites. If your account is already over the limit, nobody is removed.